Wednesday, September 1, 2010

Because I Can


Ask anyone who does home canning to describe the feeling when the kitchen is finally clean and the hot gleaming jars filled with jam or tomatoes or pears are cooling on a tea towel and you can her the faint click of the lids sealing. It's a great feeling, which I'm almost embarrassed to admit. Does this mean I need to get a life? Do I need to get off my sanctimonious canning pot? Does it mean I'm an idiot because I can get pears at Wal-Mart cheaper and faster? Maybe. Canning is time-consuming, messy, and tiring. Why bother?

My mom and dad have been canning like crazy, putting up their famous chili sauce, tomato soup, salsa, pickles and pickled beets. While unloading some of their surplus tomatoes they were commenting on how much canning is becoming a thing of the past. Back in the day, you couldn't walk into a grocery store in August or September without seeing huge canning displays and promotions. Now, you usually have to ask were it's all hiding.

I guess there is much to be said for simply knowing how to do something. I can sleep at night, knowing that what I grow won't rot on the vine and that I can preserve food for my family. I know what's in those jars - no weird ingredients, no preservatives, no junk.

And it keeps me honest because it connects me with the past and reminds me of the true price that was once paid to keep food on the table. Sure, I still get dollar menu, drink Diet Coke and know that the vast majority of what I make will fall short of the pinnacle of food purity and virtue. But every once in a while, make something from scratch. You will feel oddly redeemed.


Canned Tomato Soup


1 peck ripe tomatoes (about 8 quarts)
4 onion sliced
12 sprigs parsley
2 bay leaves
1 tsp peppercorns
1 tsp celery seed
1 tsp cloves
2 TB salt
1 TB sugar

Skin, seed, and quarter tomatoes. Tie spices in a bag. Combine all ingredients and heat very slowly; simmer for 1/2 hour. (You may want to simmer longer if you want a thick soup.) Strain, reheat and bring to the boiling point. Pour into sterilized air-tight jars leaving 1/2 inch head space. Process in boiling water bath; 40 minutes for quarts.


*Note: I added 1 t. red pepper flakes to the spice bag and 10 mintues to process time for high altitude
This makes a thin soup that would be an excellent base for any vegetable or creamed tomato soup.

Sunday, August 29, 2010

Scrollin, scrollin, scrollin...

You know when someone asks you to do something, and because your kind and accomodating, you're like, "Sure!", and then a month later you find you and your hot kitchen covered in melted dark chocolate, surrounded by 3 kinds of buttercream, two fillings, four kinds of cake, three batches of fondant and you wonder, as the Talking Heads infamously did, "How did I get here?".

That happened to me this week. My cousin Becky got married on Friday and I was thrilled when she asked me to make her wedding cake. A three-tier Italian buttercream-covered chocolate scroll-lined cake. Nevermind I'd never done chocolate scrolls. And then, another cousin's friend asks you to make a purse cake, which is, again, so great but you don't immediate realize that they need to be picked up a day apart.

Well, the Week of the Chocolate Scroll is finally over, and I'm proud to say I didn't break down and purchase these but rather perservered and made about 180 of these bad boys for my cousin Becky's wedding cake. Which, in short, was no easy task given the August heat and dearth of information on how to make them. But I did it, and am disturbingly proud of myself for figuring it out.

Also finished the purse cake in the nick of time. Funny, if somewould would have asked me five years ago if I'd be making pink and black zebra printed purse cakes I'd tell them they were crazy. What a ride.

Sunday, June 6, 2010

Daisy, Daisy


Here's a very pastel-y, mid-western-y cake I made for my friend Amy, for her mother-in-law's 70th birthday.

Here's the example the design was taken from:


It was a fun cake to do. With every cake I learn something new, and if anyone has any secrets as to how to get the petals to stay on those blessed daisies, please let me know.

Tuesday, May 25, 2010

I'm Melting!


Oh. my. heck. From This is why you're fat.com. Aparrently the guy from Man vs. Food tries to take one of these babies on, made at Melt Bar & Grilled.

Some of you may be aware of my aversion to 1) fake cheese; 2) large amounts of melted cheese; and 3) cheeses mixed together. This pretty much covers it. I gotta wrap this up. I'm seriously feeling gross.

Sunday, May 23, 2010

Mother's Day Pies


I had big ideas for mom's Mother's Day cake, but as the day drew nearer, those big ideas turned into big questions: Did a tiered cake with light yellow fondant and fresh flowers really reflect my mom? Does my mom even like cake? And ultimately, was this cake about my mom, or me?

At length I concluded that the best cake I could make for my mom was in fact a pie.

Sure, mom busted out the occasional cake from a boxed mix, but pies were something special altogether. Pies mean thanksgiving and hold the literal fruits of our labors. A good pie demands patience, practice, skill, trial and error. The rewards of a good pie? A knife shattering the sugary top, cutting through the sweet, tangy fruit through to the crisp bottom crust. Quickly lift the slice, dripping its juices, onto a plate, spoon on some loosely whipped cream, and you have what almost everyone wants at the end of their last meal on earth: a pie. In short, cake may be for celebrations, but pie means going home.

(Grandma Ginny's Pie Tin)

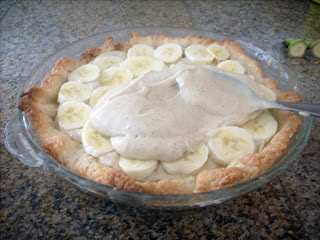
I made three pies for Mother's Day: Banana Cream (for the kids), Apple Blackberry (for the traditionalists) and French Lemon Cream Tart (to cover my bases). It was way better than making a cake.

Banana Cream Pie
(adapted from Dorie Greenspan's Baking from my Home to Yours)

The use of brown sugar and a few spices in the custard and a little sour cream in the topping adds a new dimension to the old standard.
For the custard:
2 c. whole milk
6 large egg yolks
1/2 c. light brown sugar
1/3 c. cornstarch, sifted
1/2 t. cinnamon
1/8 t. freshly grated nutmeg
1 t. vanilla extract
3 T. cold unsalted butter
3 ripe but firm bananas

1 9-inch single crust, fully baked and cooled

For the topping:
1 c. cold heavy cream
2 T. powdered sugar, sifted
1 t. vanilla extract
2 T. sour cream
Bring the milk to a boil. Meanwhile, in a large heavy-bottomed saucepan, whisk the yolks together with the brown sugar, cornstarch, cinnamon, nutmeg and salt until well blended and thick. Whisking without stopping, drizzle in a bout 1/4 c. of the hot milk to temper the mixture. Still whisking, add the remainder of the moil in a steady stream. Put the pan over medium heat and, whisking constantly, bring the mixture to a boil. Boil, still whisking, for 1 to 2 minutes before removing from the heat.

Whisk in vanilla. Let stand for 5 minutes, when whisk in the bits of butter, stirring until they are fully incorporated and the custard is smooth and silky. Cool in ice bath or refrigerate until cool (press a piece of plastic wrap on the surface of the custard if you refrigerate it).

When you are ready to assemble the pie, peel the bananas and cut them on a shallow diagonal into 1/4-inch slices.

Whisk the cold custard vigorously to loosen it, and spread about one quarter of it over the bottom of the crust. Top with half of the bananas. Repeat, adding a thin layer of custard and the remaining bananas, then smooth the rest of the pastry cream over the last layer of bananas.

For the topping, beat the cream until it just starts to thicken. Beat in the powdered sugar, vanilla, and continue to beat until the cream holds firm peaks. Gently fold in the sour cream. Spoon the whipped cream over the filling and spread it evenly to the edges of the custard.


The aftermath:

Sunday, April 18, 2010

Trial by Fondant


I have my first wedding cake under my belt, and while the end result didn't precisely match the initial conception, I'm just happy that 1) the cake tasted good, 2) the bride loved it, and 3) nobody died during the making of said cake.

There was supposed to be a second black separator under the top two tiers but the cake was wobbling dangerously anytime anyone would walk by. Did I mention the cake was perched atop an extremely high "billy table"? Scary, indeed, and in order to avoid a cake-tastrophe (tm - Ace of Cakes), the lady there doing the flowers for the cake advised me to remove the second separator. Sigh. In addition, I learned:


  • florists really like to add a lot of flowers to cake. A lot of flowers.
  • (related) I need to be more assertive about exactly how I wanted the flowers I want on a cake
  • one large dowel is better that 3 smaller dowels
  • carrot cake should never be on a top layer
  • rice krispie treats work great on a bottom layer (and everyone loves them)
  • Regional Supply can make really great custom plastic cake separators
  • watching 100 people eat a cake I made is really cool
My practice for the wedding cake was Beth's baptism cake. I'm learning to love the modern look of square cakes.

Here's a fun cake I did a few months back for my friend's daughter's birthday. For the party they went to Classic Skating, the most wonderful place on earth. I was a little nervous about sculpting roller skates out of fondant but in the end I cheated and covered baby shoes with fondant and made gum paste wheels. Hey, whatever works.

Monday, March 15, 2010

Girly girly purse cakes


When I started this crazy hobby I never envisioned that I'd be making such girly cakes. But when the Relief Society called and said they needed a purse cake for their next meeting I was happy to get the practice.

My first problem was how to make the purse shape. I thought I'd have to stack a few small cakes on each other and basically cut the cake to shape. I hate wasting this much cake, though, so I got the idea to bake some cake in small, medium, and large loaf pans. When the cakes were baked I leveled them off, inverted them, and stacked them on each other to make an angled purse shape. I had to shave off some cake on a couple of sides, but I was really surprised how well it all fit together.

I wasn't sure how to get those zebra stripes on the cake so I just mixed a little black food coloring with some almond extract and painted the pattern on. The rest of the decor is just rolled fodant pierced with a fork to make the "stitched" pattern.

The base of the cake I decorated to resemble a hat box. I'm completely useless with ribbons, so thanks to Becky for helping me with the hatbox ribbon. Looking at the result, I must conclude that there may be a small bit of girly girl left in me after all these years.


Tuesday, February 9, 2010

Vampire Kitty

What does every Korean exchange student want for her 21st birthday? Why a Hello Kitty cake, of course!


And what does every teenage Mormon girl want for her birthday? That's right, a Twilight cake.

It was a sad reality that these two cakes could not somehow be combined into a blood-sucking, scarf wearing, chess-playing, fanged little kitty.

(I am still holding out and have not read any books from the Twilight series. Who's with me? We must be strong!)

Sunday, January 10, 2010

Harry Freaking Potter

A few weeks ago a friend mentioned that she needed some cake ideas for her son's Harry Potter-themed birthday party. I enthusiastically volunteered, not fully realizing at the time that executing a Harry Potter cake is not as easy as, say, a round cake with cute polka dots. I got a few ideas online and off I went on my maiden voyage of making COUS (cakes of unusual shapes).
I saw some cute ideas of cakes online that were all beyond my current abilities, but here's what I came up with. A stack of books, a Gryffindor scarf and some store-bought detailing. (I'm not, sadly, up to speed on making gum-paste Harry Potter glasses.) I learned also that covering cakes partially in fondant is much more difficult that fully covering them, especially of your covering the bottom and top but not the sides.

I also was grateful that it didn't matter if the "books" looked old and wrinkly because they're supposed to be old and wrinkly. I had some extra cake batter so I made a little stand for the sorting hat and painted on wording with a small paintbrush and a little gel coloring mixed with almond extract.

There were plenty of mistakes (a brush gone awry was turned into a snake) but all in all I learned a lot and am excited for my next project. Perhaps I'll look back on this cake and think of my salad days of cake baking, where the steep 2 a.m. learning curve ruled the day.

In other news, another year of holiday baking is in the books. There was a new record: 12 dozen cinnamon rolls. I gotta get me a Hobart.

So, all of you that are dieting or doing that crazy Nutrisystem (sheer insanity, I tell you, but that's a post for another day), just take a long look at the cinnamon rolls, take a deep breath, and go eat some celery. Or just make the rolls.